Search
[wpdreams_ajaxsearchlite]
This tutorial will explain how to design a GUI page navigation. Page navigation is an essential component in designing a GUI. Typically there are several pages that are used for different control functions. We will create a total of five pages: Introduction, Main, Video, Audio and Blank. The blank page will be used as a template.
Step 1: Start AVSnap and switch to Control Mode by selecting the page size in pixels. Let’s select 640×480 resolution.
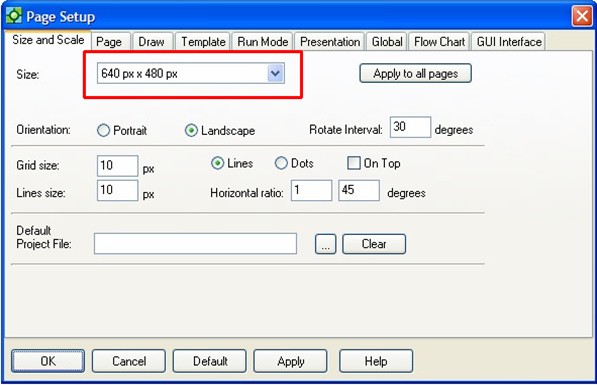
Step 2: Go to GUI Interface tab and make sure that all of the fields are set as shown below.

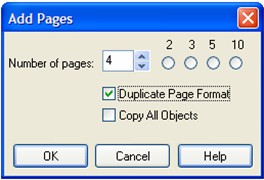
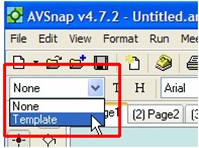
Step 3: Create four additional pages by using shortcut “N”, typing 4 in the “Number of pages” box and clicking “Duplicate Page Format”.
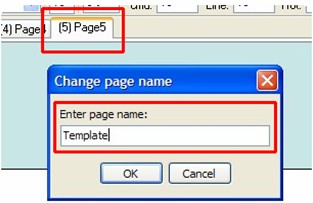
Step 4: Place mouse cursor on the Page5 tab and right click to change the name of the tab to “Template”.
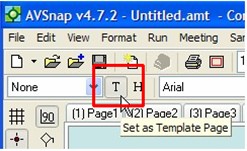
Step 5: Click on the template button to set Template page as the template.
Step 6: Go to page 1 through 4 and apply template to each page.
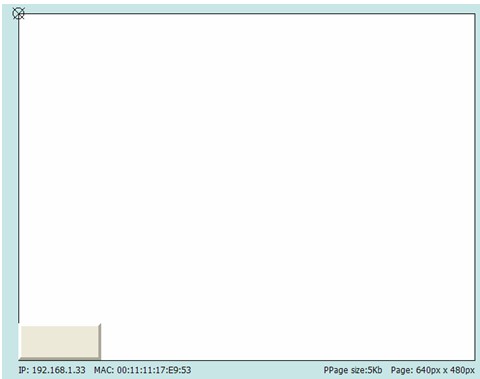
Step 7: Now go to the Template page and create one navigation button on the bottom left corner (Size: 115×50) and configure the button as shown below (use shortcut “B” for button configuration screen). Press Trigger Name to rename triggers.

Triggers can be found in the bottom of the object options screen. Note that all of the triggers are renamed starting with the ID name after “Trigger Name” is clicked. For example, the OnClick trigger has the name of “NavButtonClick.” The trigger is used to trigger an event or a sequence of events as defined in the code for a specific trigger, if any. See step 10-11 below for a sample code for the OnClick trigger.

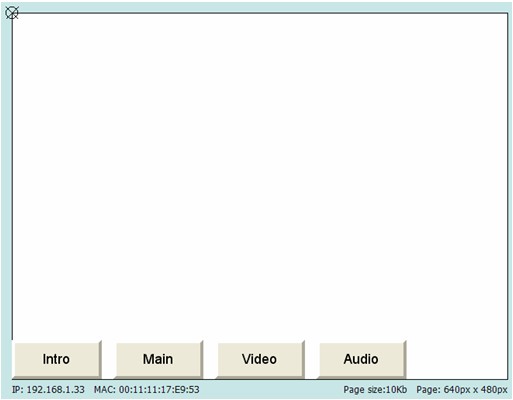
Step 8: Copy this button three more times and name them as shown below. Double click on a button to rename it.
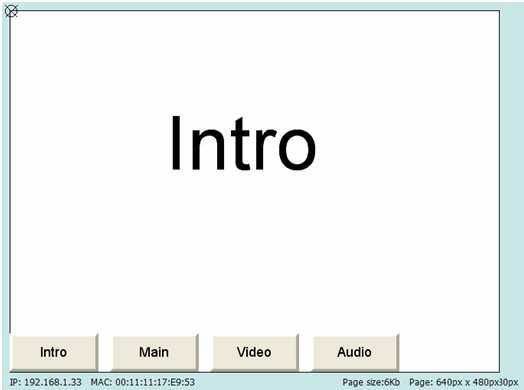
Step 9: Name page 1 through 4 so that they correspond with the button names by placing a text box on the page and adjusting the font size to 83.
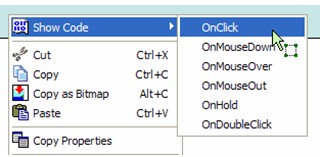
Step 10: Go to the template page and right click on any button. Select On Click trigger.
Step 11: Press F11 to display the code editor box and enter the following text in the code window.
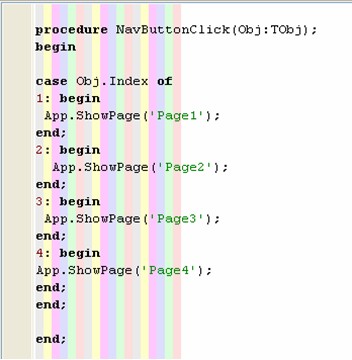
Since the buttons were created from the same button in step 8, the trigger names will be identical for all buttons. Similarly, all buttons sharing the same trigger name will have the same codes.
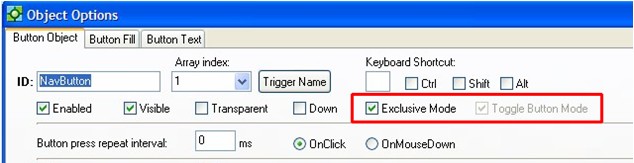
Step 12: Close the code window. Select all buttons, press shortcut “B” and select exclusive mode. This will set up buttons in such that only one button will be displayed as selected.
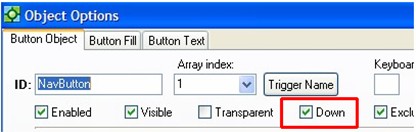
Step 13: Select Intro button, press shortcut “B” and set button to Down state.
Step 14: Press F9 to run application and switch between different pages by clicking different buttons.
Want More Help?
Get Your Free Copy of AVSnap Now
Save Your Time And Effort And Start Using AVSnap To Control Your AV System