Search
[wpdreams_ajaxsearchlite]
When designing user interfaces, sometimes there is a need to create a progress bar. The current progress bar tool in AVSnap provides only solid colors as progress indicators.
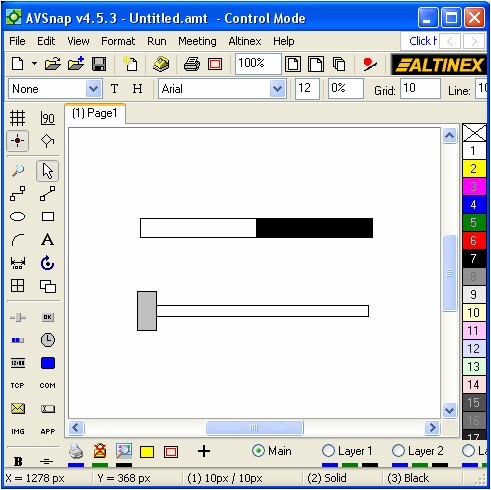
Step 1: Change the page format to pixels, which switches AVSnap into control mode. Place a Progress Bar and a Slider object on the design page.

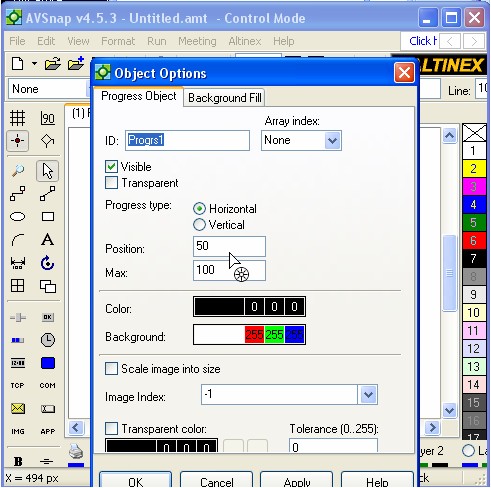
Step 2: Double click the Progress object to open up Object Options. Set the Position to 50 so you can see the color on the bar.
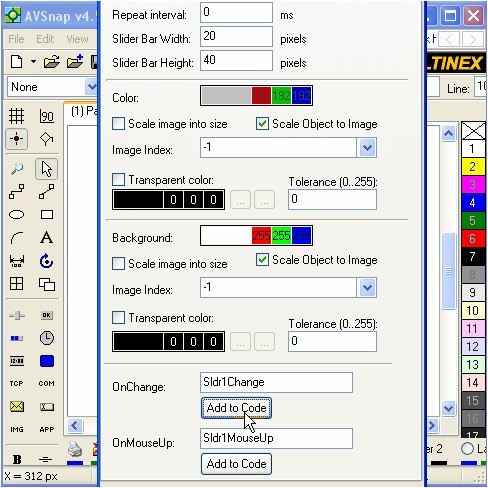
Step 3: Double click on the Slider object and click on the “Add to Code” button for OnChange trigger. Press OK.
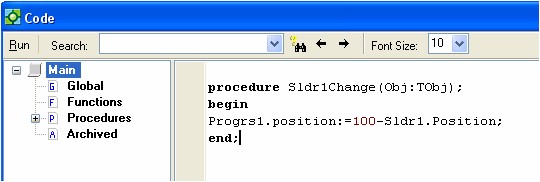
Step 4: Press F11 to see the code window and add the following code. Afterwards, press F9 and move the slider. Notice how the Progress object also moves.
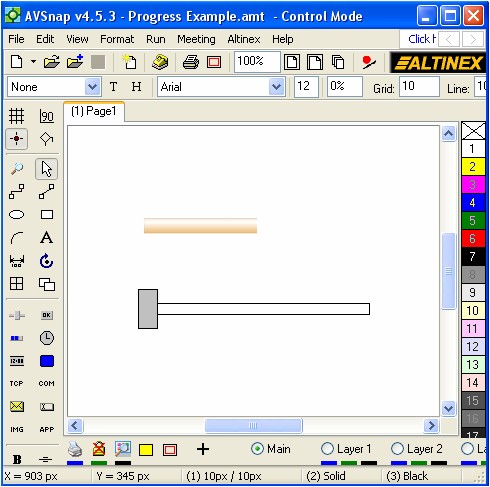
Step 5: Rotate the Progress object 180 degrees as shown below.
Step 6: Now, you can place any image on top of the Progress object. Here, we drew an image in another program and placed it on top of the Progress Object. The Drop Image message box will pop up. Select Progress Color to merge the image with the progress bar.

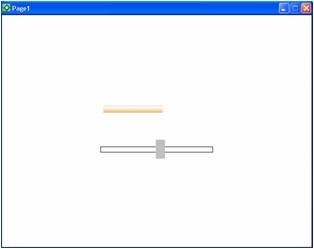
Step 7: For a final effect, double click on the Progress object, click “Transparent”, and set the Progress color to white. Then double click on the Slider and set the Position to 50.

Step 8: Press F9 again and move the slider. You will now see the new view of the Progress bar.
There are many ways to use a progress bar to achieve stunning results. This is only one example that provides a simple but effective way of showing the progress status.
Want More Help?
Get Your Free Copy of AVSnap Now
Save Your Time And Effort And Start Using AVSnap To Control Your AV System