Search
[wpdreams_ajaxsearchlite]
A layer’s Brightness feature provides a way to highlight or set to background certain parts of the project by displaying them in different brightness levels. By using this feature, new parts added to the project can be easily highlighted.
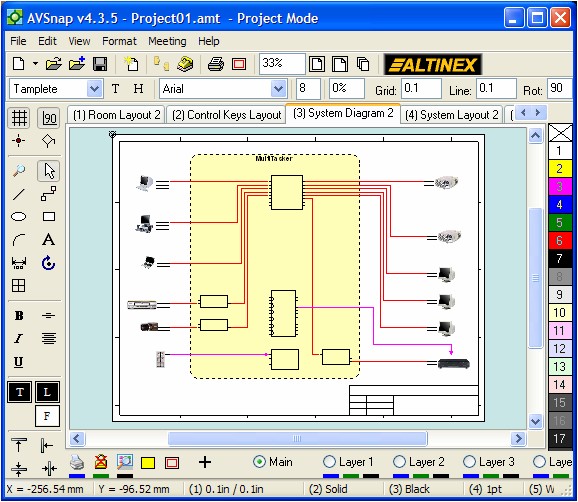
Step 1: Open a sample project provided by AVSnap from C:\Program Files\AVSnap\Libraries 4.2.0\Sample Projects\Project01.amt and then select Page 3.
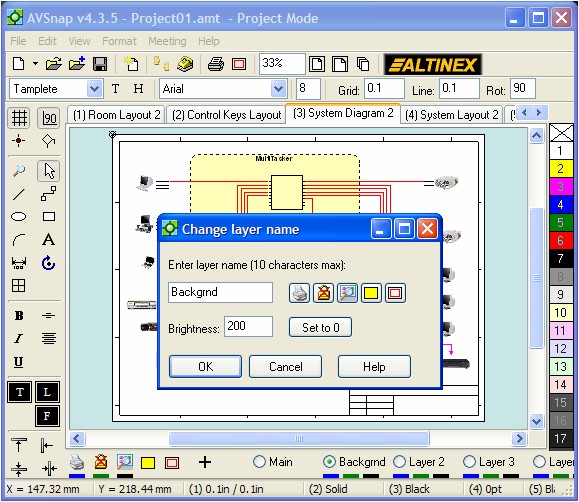
Step 2: Right click on the Layer 1 name on the bottom of the AVSnap screen, set the brightness level to 200 and rename the layer name to “Background”. The Brightness level can vary between -255 to +255. Once an object becomes Black, the adjustment in Brightness no longer has an effect. The higher Brightness level will make all objects placed on that layer look lighter if the background is white.
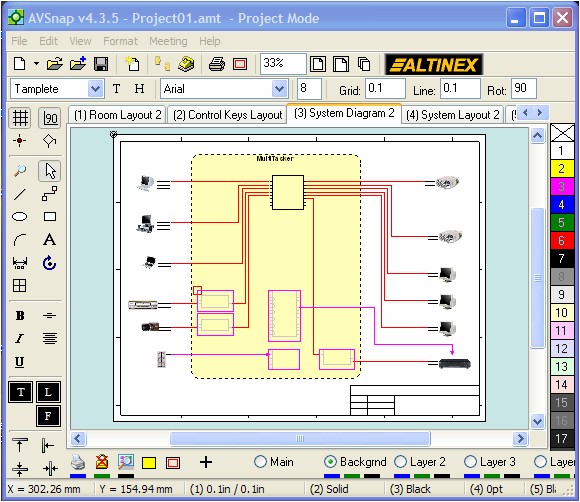
Step 3: Now select several objects on the drawing and click the Background layer. Once the Background layer is selected, these objects are moved into that layer and they become lighter in color.
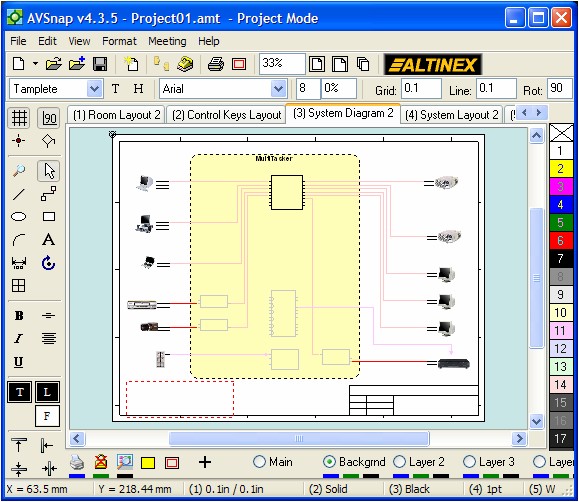
Step 4: Selecting cables and moving them to the Background layer will make them look lighter too.
AVSnap provides a simple way to set all objects to a different brightness level based on the layers they are placed on.
Want More Help?
Get Your Free Copy of AVSnap Now
Save Your Time And Effort And Start Using AVSnap To Control Your AV System